Tips and tricks for easily updating your FEM using NX expressions
Discover a quick and painless way to update your finite element model (FEM).
With NX expressions, you can define all your required parameters in one spreadsheet, and then update the FEM with a single click.
Parametric studies and “what-if” scenarios
Parametric studies typically require repeat simulations using slightly different values for the parameters that define various aspects of a model, such as part dimensions, material properties, load magnitudes, etc.
In a FEM part, these parameters are defined in their respective dialogs, which makes the process of updating them tedious, time consuming, and prone to error.
The following steps will walk you through how to use NX expressions to simplify the task of updating the FEM.
Step 1: Set up your spreadsheet
Suppose you are going to run a simulation with multiple values for the following:
• Part dimensions (hole diameter and rib thickness)
• Material properties (Young’s modulus and Poisson’s ratio)
• Load application (force magnitude and angle)
First, create a spreadsheet with the name of parameters and their values as shown in Figure 1. (Note that the name of the parameters and cell number in a spreadsheet are arbitrary.)
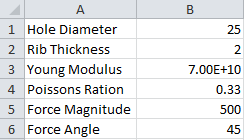
Figure 1:
Spreadsheet listing example parameters
Step 2: Add your parameters in the Expressions dialog
In NX, choose the Tools tab.
Under the Utilities group, select Expressions to open the Expressions dialog. See Figure 2.
In the Expressions dialog, enter the name of the first parameter in the Name box and set the correct type and unit for that parameter.
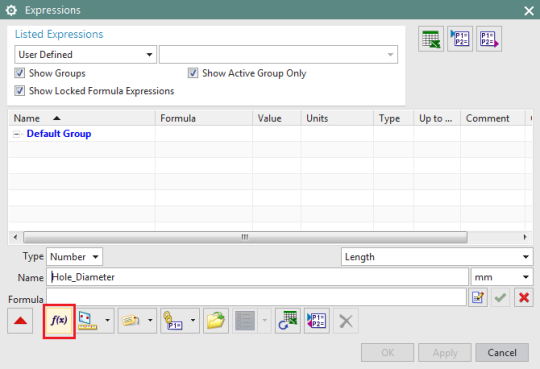
Figure 2:
Expression dialog
Step 3: Enable NX to read the spreadsheet
To allow NX to read the value of the parameter from the external spreadsheet, click on the Functions icon (shown outlined in red in Figure 2.)
In the Insert Function dialog, use the Choose a Category dropdown list to select spreadsheet. (See Figure 3.)
From the list of the functions, select ug_excel_read and click OK.
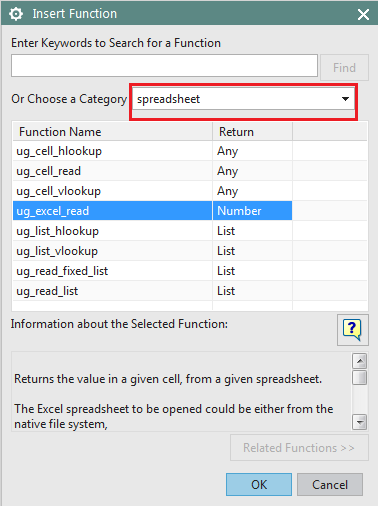
Figure 3:
Insert function dialog
Step 4: Associate spreadsheet cells with parameter values
In the Function Arguments dialog, browse for the spreadsheet that you created in the first step.
In the Specify a Cell box, enter the cell number corresponding to the parameter value. For example, in Figure 1, Hole Diameter is located in cell B1.
Click OK and repeat the process of defining expressions for all of the desired parameters.
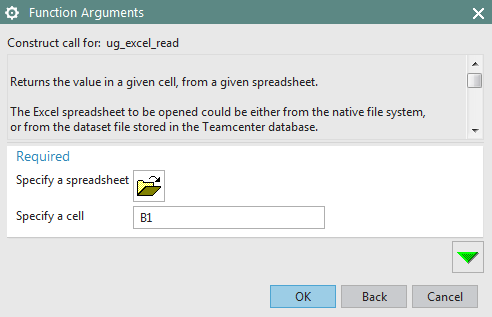
Figure 4:
Function Argument dialog
Step 5: Add user-defined expressions in the FEM
All user-defined expressions (as shown in Figure 5) can be used in the FEM.
For example, to define the Young’s modulus as an expression, select Expression in the corresponding box instead of entering a constant value.
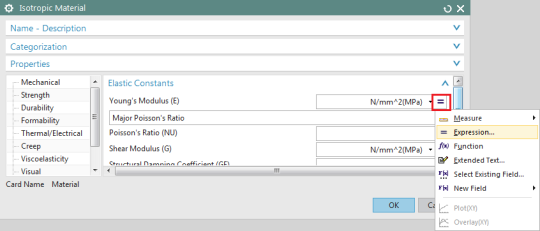
Figure 5:
Isotropic Material dialog
From the Expressions dialog then select the corresponding expression that you defined in previous steps, i.e. Young’s Modulus.
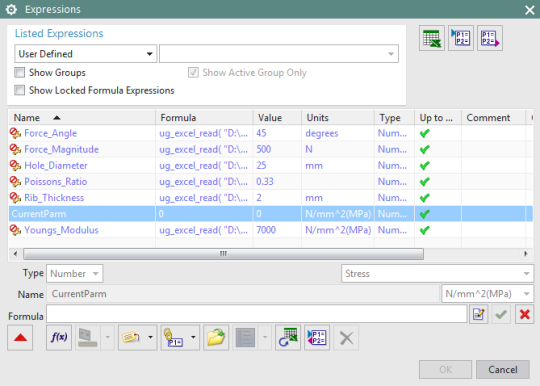
Figure 6:
Select a predefined expression
Step 6: Enjoy one-click FEM updates
Once you update the values in the spreadsheet, it’s easy to update the FEM.
Simply click on Refresh values from external spreadsheet.
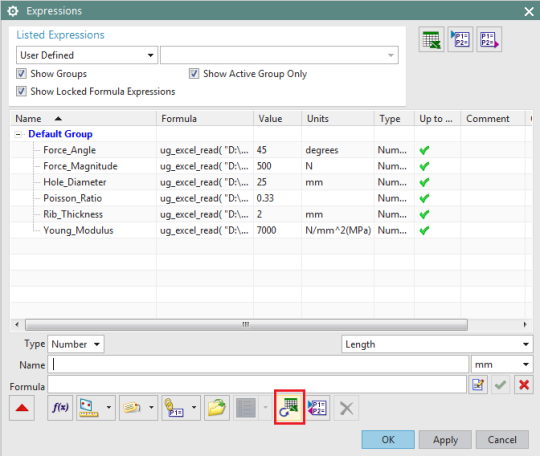
Figure 7:
Expressions dialog
Streamline your parametric studies
Just a little setup work goes a long way to streamlining your processes.
Follow these 6 steps in your next project to drive NX expressions from a spreadsheet and make iterating on what-if scenarios quicker and easier.
Looking for more tips and tricks on how to streamline and accelerate your engineering? Contact a Maya HTT expert today.
Watch the demo video