Quick Overview
When you define a contact or glue condition in your model, NX Nastran internally creates contact or glue elements using the contact or glue regions you select as well as the search distance that you define. Although these contact or glue elements may become inactive as NX Nastran iterates, it can be helpful to verify where those elements are actually created.
NX Nastran optionally generates a bulk data file containing dummy meshes representing the source and target elements used by a given contact or glue set: there are as many preview bulk data files as there are contact and glue sets in the solution. The bulk data file(s) can be imported into NX for display.
Note that for both contact and glue conditions, NX Nastran writes the preview output when it evaluates the initial contact or glue condition. This occurs before any loading is applied to the model.
Steps
1.
Define contact and
glue in the model
First, define all the contact and glue conditions in your model, and add them to your active solution. Then, in the Sim Navigator, right click on the solution and select Edit. In the
Solution dialog, select Case Control. To request export of the contact preview, follow step 2.1; to request export of the glue preview, follow step 2.2.
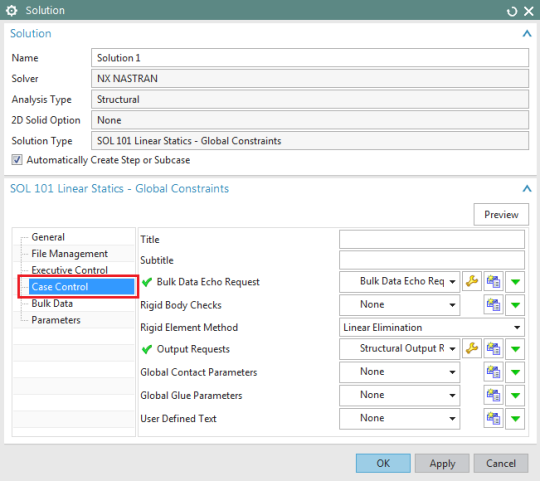
Figure 1:
Solution dialog.
2.1. Request a contact
preview output
To request creation of the contact preview, in the solution dialog, click on Create Modeling Object for Global Contact Parameters.
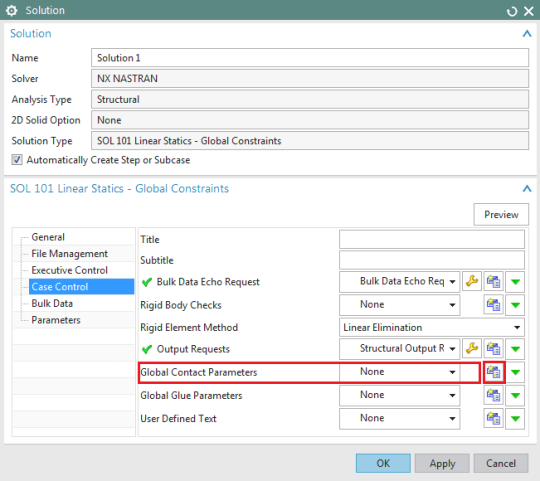
Figure 2:
Create global contact parameter object.
In the Contact Parameter dialog, under the Secondary Parameters group, set the Export a Preview Bulk Data File (PREVIEW) to Yes, and click OK.
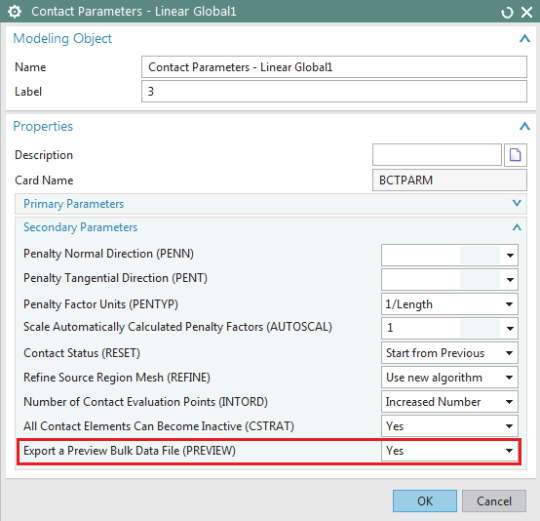
Figure 3:
Contact parameters dialog.
2.2. Request a glue
preview output
Similarly to the previous step, to request export of the glue preview, in the solution dialog, click on Create
Modeling Object for Global Glue
Parameters.
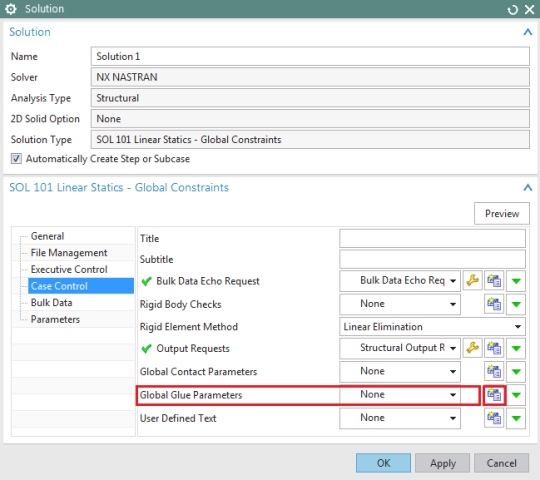
Figure 4:
Create global glue parameter object.
In the Glue Parameter dialog, set the Export a Preview Bulk Data File (PREVIEW) to Yes, and click OK.
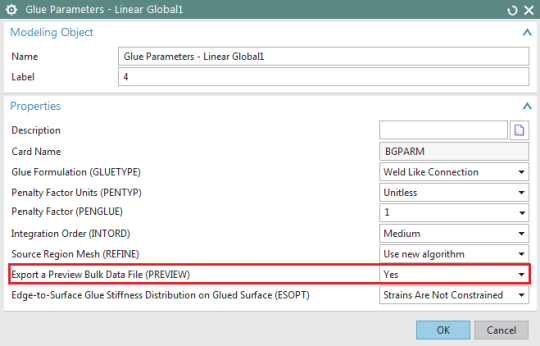
Figure 5:
Glue parameters dialog.
3. Solve the model
At this step, simply solve the model: The preview file is created in the solution directory with the following naming convention:
For Contacts:
<input_file_name>_cnt_preview_<subcaseid>_<contactsetid>.dat
For Glues:
<input_file_name>_glue_preview_<subcaseid>_<gluesetid>.dat
For example, if the solution name is test, the subcase id is 101, the contact set id is 201, and the glue set id is 301, then the preview file names will be
test_cnt_preview_101_201.dat
test_glue_preview_101_301.dat
4. Import the preview
file into NX
The procedure of importing the preview file into NX is similar to importing an NX Nastran bulk data file and is the same for both contact and glue preview files.
To import the preview file, from the File menu, select Import and then choose Simulation.
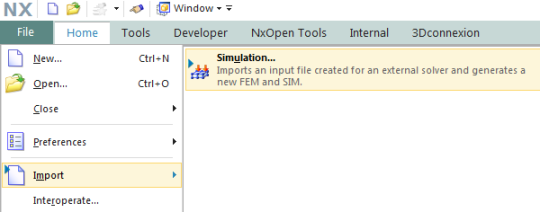
Figure 6:
Import the preview bulk data file.
In the Import dialog, select NX Nastran and click OK.
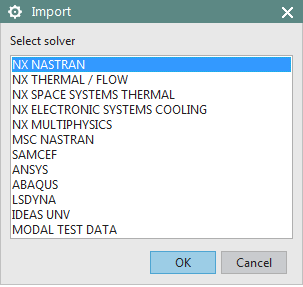
Figure 7:
Import dialog.
In the Import
Simulation dialog, browse for the preview file and click OK.
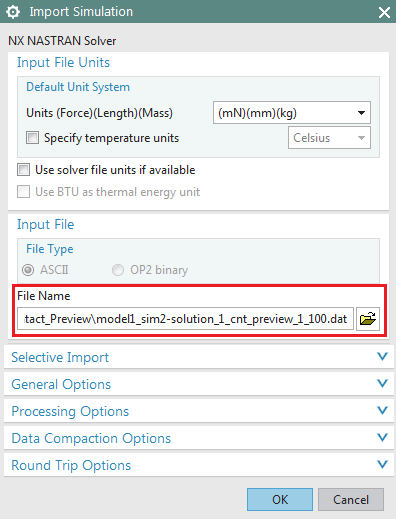
Figure 8:
Import simulation dialog.
When the simulation is imported, in the Sim Navigator, you will see the dummy meshes representing the source and target regions used for contact or glue definition.
For example, in the model of Figure 9, the complete bottom face is selected by the user as the contact source region. However, due to the Max Search Distance of 2mm in the contact definition, only a subset of those elements is considered by the NX Nastran
solver (Figure 10).
Note that at the end of a solution, some contact elements may become inactive because they did not participate in the converged condition. To view the locations of the final active contact elements, you can request contact tractions with the BCRESULTS case control command, and then view them in a post processor.
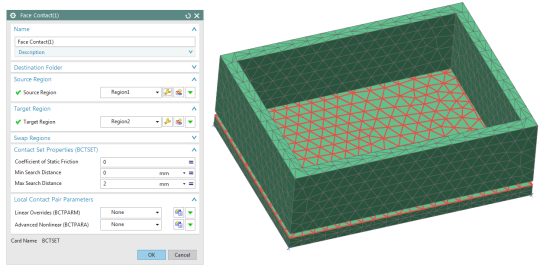
Figure 9:
Contact definition in a sample model.

Figure 10:
Contact preview imported into NX.
